Try-out package Qlipr System (choose your size)


Included in your sample pack:
- 10 pcs foam, color white, named ProteQ
- 5 pcs foam, color blue, named ProteQ
- 15 pcs clips, named Qlipr
- 5 pcs hook, named PlanthooQ
- 5 pcs of 2 mtr sustainable string, named sustainable Qord
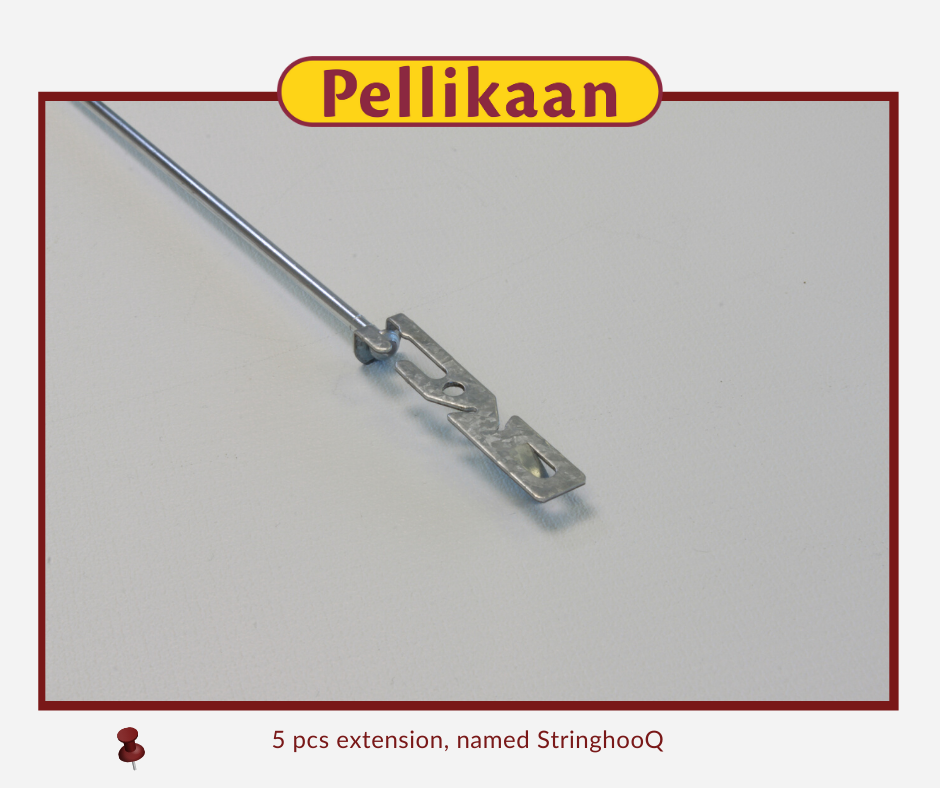
- 5 pcs extension, named StringhooQ
- 5 pcs cord hangers (connection piece between the plant hook and the rope), named Qordhanger
- Excluding transport cost
Qlipr System benefits:
- 20% Labor saving
- A one time investment
- Cost and time savings
- Environmentally friendly
- Sustainable for life
- Better working conditions
Reviews
Choose your language
Product description


Working with Qlipr - instruction manual
Qlipr consists of a crop hook of 120 cm long, two stainless steel clips and an insert of especially selected foam rubber. The length of the crop hook can be changed to 120, 100 of 80 cm for lower greenhouses and 180, 160 of 140 cm for higher cropwire. The system has many applications for all kinds of growing methods, both with one crop wire and two wires. However, the basic principle is the same everywhere. This work method explained.


Two crop wires
Qlipr is an ideal system for growers who work with two crop wires. When commencing the cultivation you attach the hook (120 cm) to the bottom wire, about 150 cm above the substrata. Then you fasten the plant with one crop clip to the hook. When the plant has grown about 50 cm, you move the crop clip in the top. You do this once again when the plant has grown about 50 cm.


Towards the top crop wire
Did all plants reach the top past of the hook (and therefore the lowest crop wire)? Then take one extra clip and one extra hook in your hand at the beginning of the row, attach this new hook to the top crop wire and fasten the plant by means of the free clip. The crop hook at the bottom wire will come free now. You then also hang this hook on the crop wire, and fasten the next plant again by means of the free clip. You go down the whole row in this way. By doing this, you fasten all plants to the crop hooks that you attach to the top crop wire. In order to help the plants in their growth, you use an extra clip. Each plant will now be fastened with two clips.
Lowering the plant
When you remove the bottom clip, the top clip will be lowered automatically with the plant alongside the hook. Now you fasten the top of the plant again with the clip. The distance between the top and crop wire is about 30 cm. Before you remove the bottom clip to lower the plant, you push the plant aside. Is the stalk of the plant not strong enough to bear the plant? Then you only move the top clip upwards. in contrast with traditional cultivation methods, the plants can grow above the wire with Qlipr.


Making extra tops
Making extra tops can be done easily and quickly with Qlipr. After the plant has been lowered, you place the clip under the correct shoot. An extra crop hook is hung next to each plant. If the shoot has grown about 50 cm, you fasten the main stalk on the extra hook (after having lowering the plant). The new top can now grow further alongside the existing crop hook.
At the end of the cultivation
If the top has come out of the plant at the end of the cultivation, the plant will still hang on the clip after it has been lowered for the last time. Now you can harvest the last fruit. When clearing the cultivation you finally remove the last clip. Now the green lies on the ground and it can be cut into pieces and composted at once; after all, the waste material does nog contain any synthetic material.
Work requirements
For the strains that grow straight upwards alongside the wire, it is enough to fasten them once every fourteen days. Fastening and lowering the plants is done in one action. Within the same action the plants can be pinched out and trimmed, if necessary. You must observe a schedule of once a week with strains that grow away from the wire. With Qlipr you reduce the work effort to about ten to fifteen minutes per hundred plants. Because the plants do not have to be turned in anymore, the Clusters will hang on one side.

One crop wire
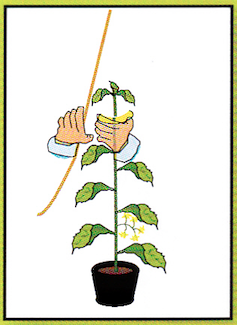
Do you work with one crop wire? In that case Qlipr also has a solution. You fasten the crop hook to the crop wire at the top in the greenhouse. You hereby gear the height of the crop wire to the average-top-cluster length (the distance between the top and the harvestable cluster) of the crop and the required picking height. At the start of the cultivation the crop hook has a jute or sisal string of a few metres. The top of the plants is fastened to this when it is about 50 cm high. When the plant has grown about 50 cm again, the second crop clip will be used. Now the plant is fastened with two clips. Every time that the plant has grown 50 cm again, you move the clips. As soon as the plant has reached the crop hook, the clips must not attached anymore to the string, but to the hook.
Whatever growth method you apply; Qlipr will save time and money for you.
That's not all; it will also greatly improve the working conditions of you staff.
Work Method - downloads
Share our page: